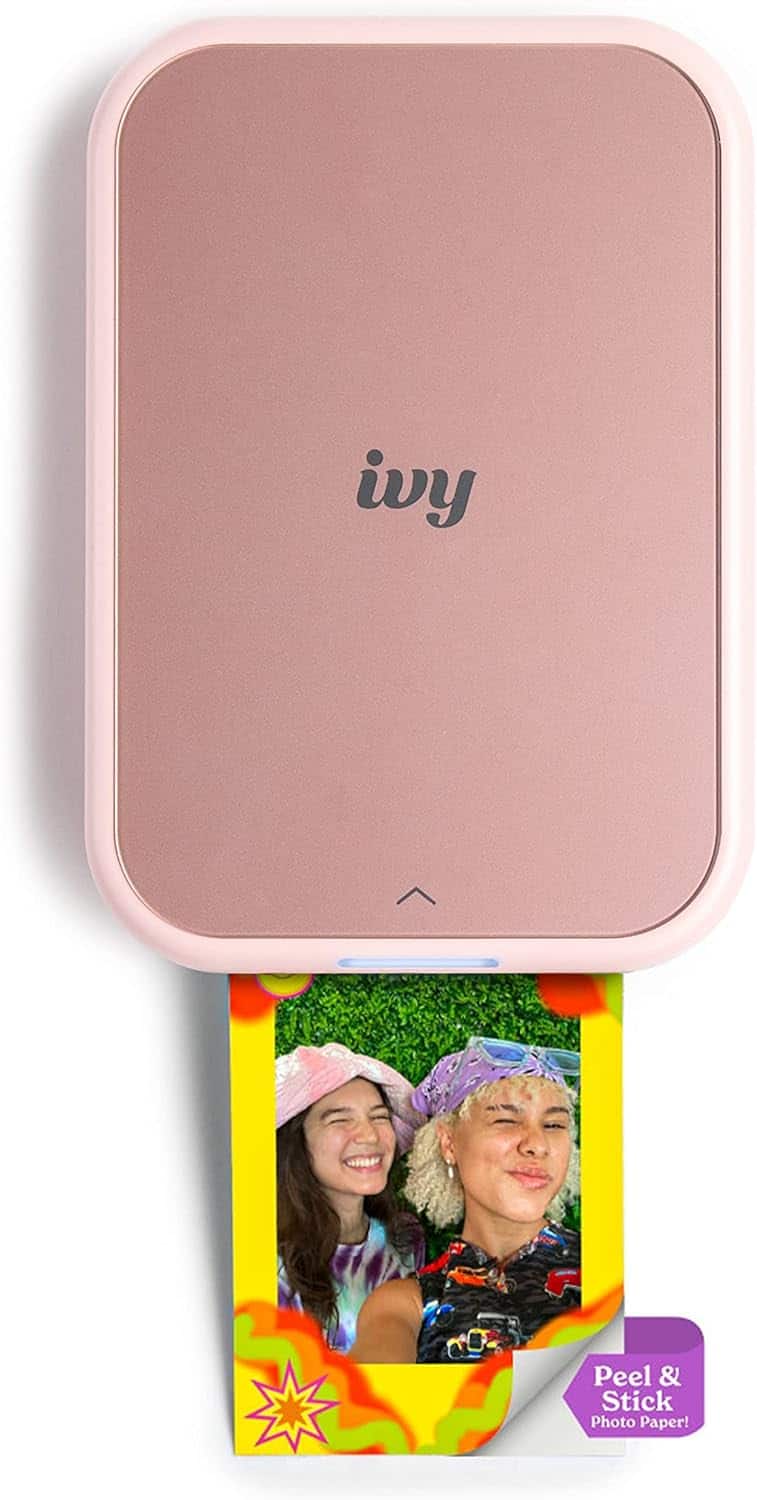
The Canon IVY Mini Photo Printer turns your digital photos into physical keepsakes. It’s small enough to fit in your hand and can print 2″ x 3″ peel-and-stick photos from your smartphone or social media accounts. Setting up your Canon IVY printer is essential for a smooth user experience. This guide simplifies the setup process, covering package contents, charging the printer, loading paper, and connecting to your device. It also includes troubleshooting tips.
To get started, charge the printer using the included micro USB cable until it’s fully charged. Then, download the Canon Mini Print App to connect the printer to your mobile device. The app allows you to edit photos and apply filters before printing. Follow the user manual for instructions on pairing with your device, usually involving enabling Bluetooth and connecting through the app.

Canon IVY Printer Setup: A Step-by-Step Guide
Check Package Contents
Before you start, ensure your Canon IVY printer package includes the following:
- Canon IVY Mini Photo Printer
- USB Charging Cable
- Quick Start Guide
- Canon ZINK™ Photo Paper (10 sheets)
Charge the Printer
Connect the smaller end of the provided USB cable to the printer and the other end to a power source. The charging LED light will turn red. Once fully charged, it will turn green. Charging typically takes about 90 minutes.
Download the Canon Mini Print App
Download the “Canon Mini Print” app from the App Store (iOS) or Google Play Store (Android). This app is essential for connecting your mobile device to the printer and accessing features.
Load ZINK Photo Paper
Slide the printer lid open. Gently press down and push back on the arrow symbol. Load the ZINK Photo Paper with the blue barcode facing down. Ensure the paper stack does not exceed 10 sheets.
Turn on the Printer
Press and hold the power button until the white LED light turns on. This indicates the printer is ready for pairing.
Connect to Your Device
Open the Canon Mini Print app and follow the on-screen instructions to connect your mobile device via Bluetooth. The app will guide you through the pairing process.
Troubleshooting Tips
If you encounter any issues during setup:
- Ensure Bluetooth is enabled on your device.
- Verify the printer is turned on and within range.
- Check the battery level of the printer.
- Restart your device and the printer.
- Refer to the Quick Start Guide for troubleshooting steps.
Printing Your Photos
Once connected, select a photo from your device’s gallery or take a new one using the app. Edit the image if desired and then tap the “Print” button. The printer will process the image and eject a print within seconds.
Key Takeaways
- Canon IVY Mini Photo Printer offers portable and convenient photo printing.
- Proper setup includes charging the device and downloading the Canon Mini Print App.
- First-time pairing requires following the user manual and connecting via Bluetooth.
Setting Up Your Canon IVY Printer
When preparing your Canon IVY Mini Photo Printer for use, following step-by-step guidance is key for a smooth setup experience. This section walks through the initial unboxing, powering, and paper loading.
Unboxing and Understanding Your Printer
After opening the box, it’s essential to familiarize yourself with the contents and features of your Canon IVY Mini Photo Printer. The box should include the printer itself, a USB charging cable, and a starter pack of Zink photo paper. Review the User Manual for a complete list of Supplied Items and to understand Product Features and Safety Information.
Charging and Power Management
Before you can start using your printer, it needs power. Your Canon IVY Printer comes with a built-in battery. Charge the printer by connecting the supplied USB cable to a power source. A full charge takes around 90 minutes. Power on the device by holding the Power Button. The printer will automatically power off after a period of inactivity to save energy.
Loading Paper and Maintenance
To print, you’ll need to load Zink paper. Open the paper tray, place the blue Smart Sheet at the bottom, and stack the paper on top. Close the tray gently. The Smart Sheet cleans the printer and calibrates it for your paper batch every time you load new paper. Regular maintenance is crucial, so check the User Manual for specific care instructions and consider investing in a CarePak Plus for extended service coverage.
Connecting and Printing with Canon IVY
Before printing cherished memories with the Canon IVY Mini Photo Printer, users need to install the Canon Mini Print App and pair their mobile devices through Bluetooth. This section will guide you through the easy steps to start printing photos quickly.
Installing and Using the Canon Mini Print App
To begin, locate and download the Canon Mini Print App from your device’s respective app store—iOS users can search on the Apple App Store and Android users on the Google Play Store. After installing, open the app and follow the on-screen instructions. It may prompt you for a firmware update—this is crucial for optimal performance, so make sure your printer is up to date.
Next, the app’s user interface will showcase a main menu where you can select photos to print. The app offers features such as borderless printing and creating a collage, allowing for a personalized touch to your photos.
Pairing Devices and Printing
Once the app is installed, turn on your Canon IVY printer. The printer should be in Bluetooth mode, indicated by a status LED light. Open the Bluetooth settings on your mobile device and connect to the printer’s signal. You might see a prompt to accept the pairing; confirm it to establish the connection.
With the devices paired, select a photo to print from the app. Before printing, you can edit your photo, adjust settings, and even check the printer status. When ready, tap the print button and the Canon IVY will produce a 2″ x 3″ photo with the option for peel-and-stick back, so you can directly place it onto any surface you like. Enjoy clear, itful prints at 314 x 400 dpi resolution, perfect for sharing with friends and family.
Frequently Asked Questions
Setting up your Canon IVY printer involves connecting it to your device, getting familiar with the app, and solving any connection issues that may arise.
How can I connect my Canon IVY printer to my iPhone?
To connect the Canon IVY printer to your iPhone, download and open the Canon Mini Print app. Make sure Bluetooth is activated on your iPhone. Pair your printer within the app by selecting it in the ‘My Printer Settings’ menu for a smooth connection.
What steps are involved in the Canon IVY printer initial setup?
For the initial setup, charge the printer, turn it on, and install the Canon Mini Print app on your device. Follow the in-app instructions to pair your printer with your device. Load the recommended paper and you’re ready to start printing.
Why is my Canon IVY printer not connecting to my device?
If your Canon IVY printer isn’t connecting, check your device’s Bluetooth settings and ensure they are ON. Ensure your printer is charged and within range. If issues persist, consider rebooting your device or resetting the printer.
Which app is required to operate the Canon IVY printer?
The Canon IVY printer operates with the Canon Mini Print app. This app is necessary for pairing the printer to your device, customizing, and printing your photos. It’s available on the App Store and Google Play.
How do I troubleshoot issues with my Canon IVY printer?
Start troubleshooting by ensuring the printer has power and is charged. Check that your device’s Bluetooth is on and the printer is shown as connected in the Canon Mini Print app. If you encounter a paper jam, use the guidelines provided in the manual to remove it safely.
What is the process for resetting a Canon IVY Mini printer?
To reset the Canon IVY Mini Printer, locate the reset button, typically found on the bottom or back of the printer. Use a pin or paper clip to press and hold the reset button for a few seconds. Release the button when the LED light flashes, indicating the reset is complete.


