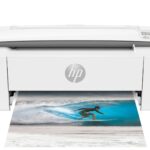
Setting up the HP LaserJet Professional P1102w for wireless printing can streamline your work. This compact printer offers both USB and wireless connectivity options. The wireless setup process involves using the printer’s control panel and your computer to connect it to your Wi-Fi network.
The P1102w is designed for home offices and small businesses. It prints up to 19 pages per minute and has a 150-sheet input tray. These features make it suitable for everyday printing tasks.
Before starting the setup, gather your Wi-Fi network name and password. You’ll also need to download the correct drivers from HP’s website. Once you have these, you can begin the wireless configuration process.
Setting Up Your HP LaserJet Professional P1102w Wirelessly: A Step-by-Step Guide
The HP LaserJet Professional P1102w is a compact and reliable printer, perfect for home offices or small businesses. Setting it up wirelessly gives you the freedom to print from your laptop, smartphone, or tablet without being tethered by cables. Here’s a comprehensive guide to help you get your P1102w connected to your Wi-Fi network.
Before You Begin
Gather the following items before you start:
- Your HP LaserJet P1102w printer
- The power cord
- A USB cable (this is usually included with the printer)
- Your Wi-Fi network name (SSID) and password
- A computer or mobile device connected to your Wi-Fi network
Installation Methods
There are two main ways to set up your HP LaserJet P1102w wirelessly:
- Using the HP Smart app (recommended): This is the easiest and most convenient method, especially for mobile devices.
- Using the HP Easy Start software: This method is suitable for computers.
Method 1: Using the HP Smart App
- Download the app: Download and install the HP Smart app from your device’s app store (available for iOS, Android, Windows, and macOS).
- Connect the printer: Turn on your printer and connect it to your Wi-Fi network using the HP Smart app. The app will guide you through the process.
- Add your printer: In the HP Smart app, tap the plus sign (+) to add your printer. Follow the on-screen instructions to connect your printer to your Wi-Fi network.
Method 2: Using HP Easy Start
- Download the software: Go to the HP website and download the HP Easy Start software for your operating system.
- Connect the printer: Temporarily connect your printer to your computer using the USB cable.
- Run the software: Open the HP Easy Start software and follow the on-screen instructions to connect your printer to your Wi-Fi network.
Troubleshooting Tips
If you encounter problems during setup, try these troubleshooting steps:
- Check your Wi-Fi connection: Make sure your computer or mobile device is connected to the same Wi-Fi network as your printer.
- Restart your devices: Restart your printer, computer, and router.
- Check for printer updates: Use the HP Smart app or HP Easy Start software to check for and install any printer updates.
- Temporarily disable firewalls: Firewalls can sometimes interfere with printer setup. Temporarily disable your firewall and try again.
- Reset the printer: If all else fails, you can reset your printer to its factory defaults. Refer to your printer’s user manual for instructions on how to do this.
| Setup Method | Description |
|---|---|
| HP Smart App | Easy and convenient setup using your mobile device or computer. |
| HP Easy Start Software | Traditional setup method using your computer. |
Key Takeaways
- The P1102w can connect via USB or Wi-Fi
- You need your network name and password for setup
- HP’s website provides the necessary drivers for installation
Preparing for Installation
Getting ready for your HP LaserJet P1102w setup is key. You’ll need to check if your computer can work with the printer and plug it in correctly.
Checking System Requirements
The HP LaserJet P1102w works with most computers. It needs Windows 7 or newer for PCs. Macs need OS X 10.7 or later. Your computer should have at least 1 GB of free space. A fast internet link helps too.
Check these things before you start:
- Operating system version
- Free disk space
- Internet speed
Make sure your computer meets these needs. This will help the setup go smoothly.
Connecting the P1102w to a Power Source
Plug in your P1102w printer the right way. Find a spot near your computer and a power outlet. Take the power cord out of the box. Put one end into the back of the printer. Plug the other end into the wall socket.
Look for these signs that it’s working:
- Lights on the control panel turn on
- Printer makes a soft hum
Don’t turn on the printer yet. Wait until the setup process tells you to. This helps avoid problems later on.
Executing the Wireless Setup
Setting up the HP LaserJet Professional P1102w printer wirelessly involves a few key steps. The process includes using the HPsetup.exe program, connecting to your wireless network, and finalizing the setup.
Using HPsetup.exe
HPsetup.exe is a key tool for setting up the P1102w printer. To start:
- Download HPsetup.exe from HP’s website.
- Run the file on your computer.
- Follow the on-screen prompts.
The program will guide you through the setup process. It will ask for your printer model and network details.
Make sure your computer is on during the whole setup. Keep the USB cable handy. You may need it for part of the process.
Establishing a Wireless Connection
To connect your P1102w to Wi-Fi:
- Turn on the printer.
- Press the wireless button on the printer.
- The blue light will start blinking.
- On your computer, open the list of Wi-Fi networks.
- Find and select your printer’s network.
- Enter the network password if asked.
The printer’s light will stop blinking when it connects. This means it’s ready for the next step.
If you have trouble, try moving the printer closer to your router. Make sure your router is on and working well.
Finalizing the Setup
To complete the setup:
- Open the printer software on your computer.
- Click “Add a printer” or a similar option.
- Select your P1102w from the list of found printers.
- Follow any last steps shown on screen.
Try a test print to make sure everything works. If you have issues, check that the printer is still connected to Wi-Fi.
Remember to install the latest drivers for best results. You can find these on HP’s website.
Frequently Asked Questions
Setting up the HP LaserJet P1102w for wireless printing can be tricky. Here are answers to common questions about connecting this printer to Wi-Fi networks and devices.
How can I connect my HP LaserJet P1102w to a wireless network?
Press the wireless button on the printer’s control panel. Choose “Wireless Setup Wizard” from the menu. Select your network name and enter the password. The printer will connect to your Wi-Fi network.
What are the steps to set up a HP LaserJet P1102w on a Mac wirelessly?
Turn on the printer. On your Mac, go to System Preferences and click Printers & Scanners. Click the plus sign to add a printer. Select your HP LaserJet P1102w from the list. Click Add to finish setup.
Is it possible to configure the HP LaserJet P1102w for wireless printing without a USB cable?
Yes, you can set up the printer wirelessly without a USB cable. Use the printer’s control panel to connect to your Wi-Fi network. Then add the printer on your computer or mobile device.
How to reset the wireless settings on an HP LaserJet P1102w?
Press and hold the wireless button for 5 seconds. The wireless light will start blinking. Press the cancel button. This resets the wireless settings to factory defaults.
Can I set up my HP LaserJet P1102w printer using an Android device?
Yes, you can use an Android phone or tablet. Download the HP Smart app from the Google Play Store. Open the app and tap the plus sign to add a printer. Follow the steps to connect your P1102w to Wi-Fi.
What is the procedure to wirelessly connect an HP LaserJet P1102w to an iPhone?
Install the HP Smart app on your iPhone. Tap the plus sign to add a printer. Select your P1102w model. The app will guide you through connecting the printer to your Wi-Fi network. Once connected, you can print from your iPhone.


